|
||||||||||||||||||

|
My first construction job was to fit the rear panels that also house the hard-wired crossovers.
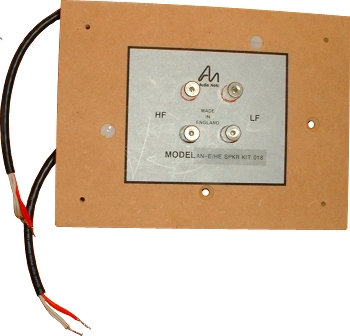
The four small holes near the corners are where we insert the supplied self-tapping screws that will screw the panel to the back of the speaker cabinet (from the inside).
Some Blu-Tack is used here to provide an airtight seal. You will notice from the picture that there were a couple of holes besides the screw holes - these, of course, would have to be blocked to allow an efficient seal. It is left up to you how much Blu-Tack you use and how you position it.
Note that each pack of Blu-Tack services one loudspeaker. The Blu-Tack is also used to seal the drivers later. Therefore you must think about how much you are going to use for the rear panel sealing process so that you leave enough to finish off the rest of the loudspeaker.
Fortunately for me, Blu-Tack is available virtually everywhere where I live (in the UK) - I can actually get it from the news agents around the corner so I can use as much as I wish here. You may not be as fortunate as I have heard stories from people in other parts of the world who have great difficultly obtaining it.
I suggest that before you start, you insert the rear panel and move it around to find the best position and to give you an idea about where the sealant should be applied, how much play you have, etc. If your cabinet has a nice finish on it then I might suggest putting some insulation tape over the fly-leads from the crossover so that you don't accidentally scratch your finish when inserting the panel through the woofer hole.
You should also make sure that around the rear panel cutout, on the inside of the cabinet, that the surface that may come into contact with the rear panel/sealant is clean and free from dirt and left-over glue etc. that might interfere with efficiency of the seal.
Alignment and Preparation
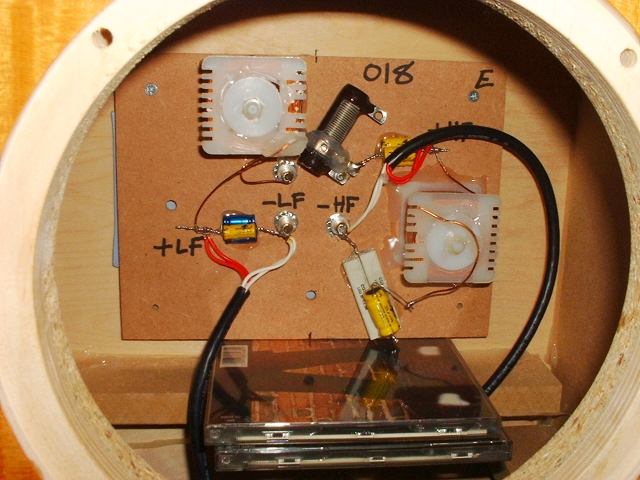
I found that if I took two standard sized CD cases, put one on top of the other, and rested them on the cabinet's rear brace (pulling the lower one out slightly to clear the glue line that ran across the top join) that I could then rest the rear panel on them to position the panel height exactly where it was needed in an ideal level position.All that was then needed was to position horizontally - that was easy just mark a center point on the top and bottom of the panel and draw a center line on the back, inside of the cabinet 'through' the rear opening. They could then be matched up easily.
Of course, I can't guarentee that the panels are always manufactured consistently from batch to batch so you should experiment yourself before following my methods here.
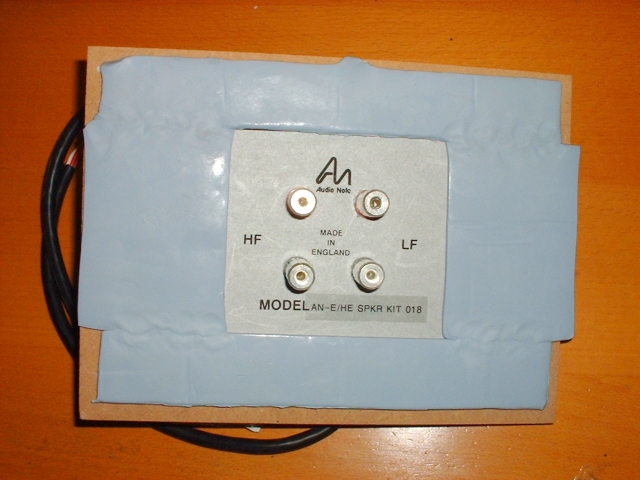
Some may well say that I have gone a little over-the-top with my use of Blu-Tack here. Indeed, I have used nearly 2 whole packs; just on the one panel! But, as I stated earlier, Blu-Tack is so readily available where I am (and cheap).
I began by cutting one of the packs in half length-ways so that I had two long strips. They were placed along the top and bottom of the panel and pressed down gently to fix them on. I also made sure that they covered the screw holes.
Next, I cut a new pack (width-ways this time) so that I had the side parts. I cut the sides slightly too long so I had to push them down - this also pushed them slightly into the top and bottom pieces, as intended. To provide a better join, I then moved my fingers alternatively up and down along the joins - pushing and pulling one piece into another. Be gentle here though because you don't want to create too much of a trough.
I wanted also to make sure that I covered the fixing holes - that way, I thought that there would be fewer pressure distribution problems when tightening the screws later.
Here, the panel is being fitted. The two top screws have gone in (do not fully tighten yet). The panel still rests on the CD cases and has been centrally aligned. The next step is to remove the CD cases and fit the lower two screws.
You should put a little thought into the tightening of the screws. They should initially all start at the same 'height' before turning about half a turn each - rotating around. The idea being that you tighten the seal evenly. It is also important not to over-tighten and 'strip' the wood as a consequence.
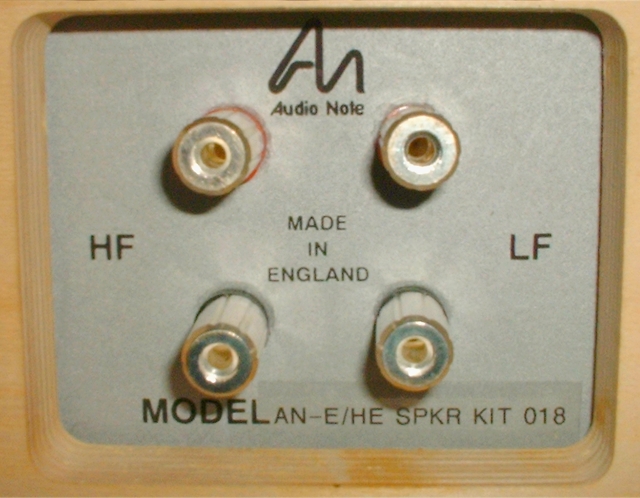
Your rear panel should now be nicely aligned in the rear cutout with no lettering or logo being obscured.
Now, a note on the screws. The supplied screws are three-quarter inch wood screws. I decided to use 1-inch wood screws instead because adding the thickness of the rear panel to the thickness of the Blu-Tack didn't leave much 'biting' room for the screws. I also pre-drilled a pilot hole partially through the screw positions in the back plane of the cabinet to guide the screws. I only used a very thin drill bit for this (around 1mm diameter). As I have admitted elsewhere, however, I am no carpenter so you should judge the situation for yourself rather than just follow my lead on this one.
|
|