|
||||||||||||||||||

|
At this stage, the PSU board should now be fully connected to the mains transformer secondaries.
Before we can test whether all is OK, we must connect two voltage regulators and connect the front panel's LED.
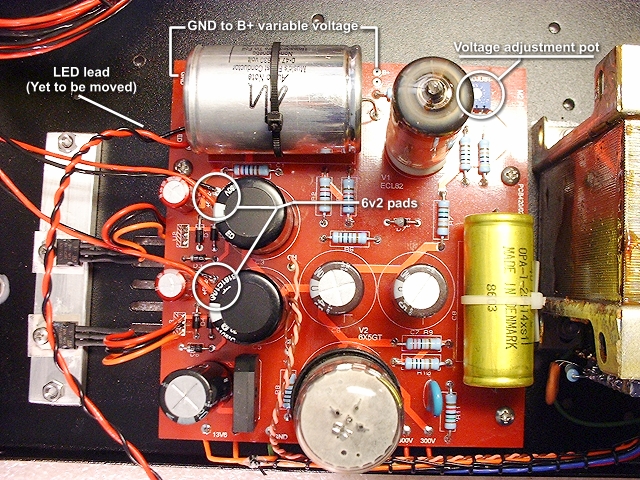
Because the board was able to 'hinge', I first took the opportunity of soldering fly leads for the two 6.2v pad pairs because once the regulators were in place, there wouldn't be much room to manouver in that area.
The regulator assembly
The regulators are mounted on a heatsink which, in turn, is mounted directly onto the chassis.
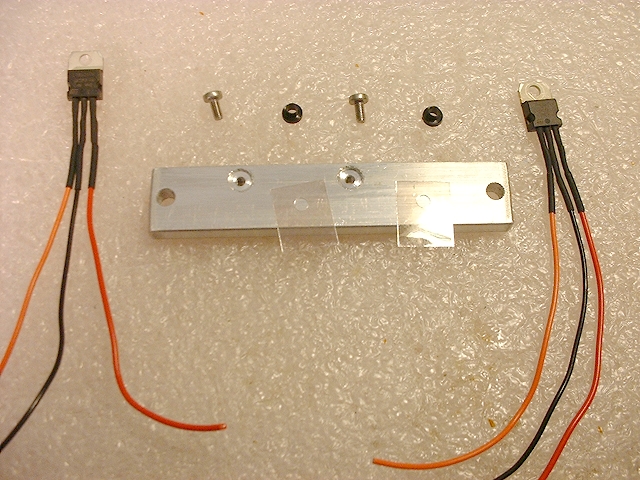
The bodies of the regulators must be insulated from the heatsink. The mica washers and plastic washer inserts provide this insulation.
I also used a very small amount of heatsink compound - this should be used very sparingly as too much will have a negative affect. Also, wash your hands immediately after using the heatsink compound otherwise it will end up everywhere!
Once the regulators have been attached to the heatsink, you should circuit test to make sure that the regulator body is not shorted to the heatsink. Once satisfied, secure the heatsink assembly to the chassis as tightly as possible.
Now it is time to attach the leads from the regulators to the relevant pads on the PSU board.
Testing the board
Once both the regulator assembly and LED are connected to the board. It is time to fit the two valves onto the board, install the fuse, stand back, and switch on (first making sure that any unsecured leads that are attached to the PSU are not shorted to anything).Make one final inspection of the board, making doubly sure that all the diodes and electrolytic capacitors are the right way round.
Once you are happy, switch on. Watch for the LED coming on - if it doesn't then switch off immediately and investigate why.
The main test points are the two 6v2 pads and between GND and B+. The voltage between GND and B+ can be varied using the small variable resistor on the board.
|
|