|
||||||||||||||||||

|
| Introduction |
So what are the options? You can go for a manual approach, which involves lots of different brushes and lots of time and patience - or you can look at a Record Cleaning Machine. I have always fancied the latter but the price of such machines is rather off-putting. The thing that most made up my mind was that my brother-in-law gave me a large batch of records that had been lying around his loft for the past 10 years. These were in a terrible condition as many had been left out of their sleeves (he was never any good at looking after records himself) but they held a great nostalgic value to me as I grew up listening to many of them and some you simply can't get anymore (even on CD). The option of an RCM (Record Cleaning Machine) also opens the door to buying quantities of cheap used records from charity shops, car boot sales, etc.
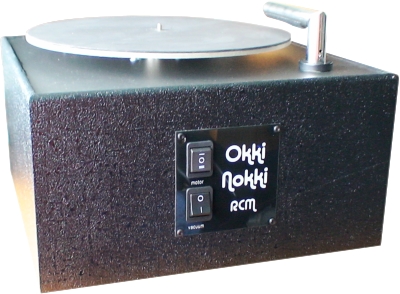
I pondered a great deal over which RCM I should go for. Fortunately, a friend who I correspond with recommended the Okki Nokki RCM. This appears to be pretty much equivalent to the VPI 16.5 (minus its lid but plus forward and backward rotation) but at a considerable lower cost. I did a little more investigating and found this to be highly recommended by its users so off I went...
The price of the Okki Nokki is pretty much fixed at a standard price in this country (UK) at £295 (at time of writing). However, I found that a Hi-Fi dealer called The Emporium also throw in some freebies such as spare felt pads for the vacuum arm, free anti-static record sleeves, and a spare vacuum arm for 45's (I never play 45's so they sent me a spare bottle of the Okki Nokki cleaning concentrate instead). I found Nick at the Emporium to be most helpful and cooperative. I ordered the RCM on the Friday and told to expect its arrival on the Monday and that's exactly what happened.
The Okki Nokki is manufactured in Germany and is supplied throughout Europe (I don't know if it is available elsewhere or not). It's manual is supplied in three languages (English, German, and Dutch?).
|
|
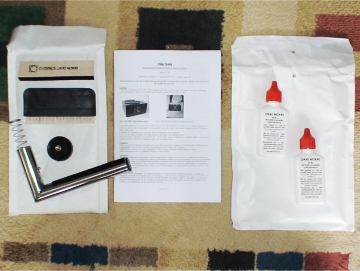
Above left, you can see the RCM as it comes out of the box. Above right are the standard parts and accessories that come with it. The unit comes with:
- Cleaning fluid applicator brush
- General cleaning brush
- Spindle locking nut
- Stainless steel suction arm
- Manual
- 2x 50ml bottles of cleaning concentrate
- Power cord.
Each bottle of concentrate is to be added to 1 litre of purified water.
| Basics |
| Assembling |
|
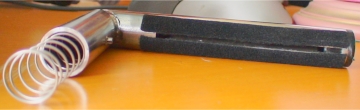
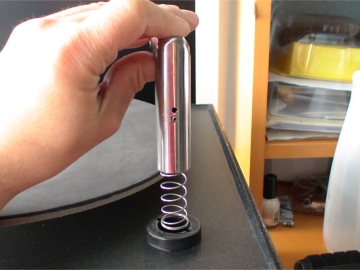
A velvet pad is stuck to each side of the slot in the suction arm. These should be checked regularly for wear and dirt build-up. I was supplied with some spares by my dealer free-of-charge.
A cylinder protrudes from each side of the suction arm that correspond with slots in its housing. These are used when the arm is swung around to its active position and allow it to be lowered onto the record at the correct angle. |
| Preparation |
|
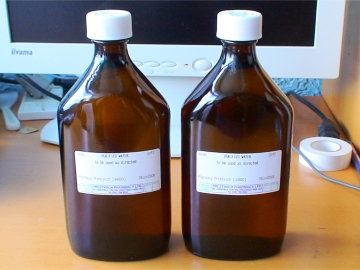
I got some distilled water from the local chemist. Distilled water is very cheap - cost me about 20 pence per 500ml. The bottles were extra (£1.65 each) but can be taken back to be re-filled.
Each bottle of 50ml concentrate creates 1 litre of solution. The picture shows 2x 500ml bottles. I don't know much about the Okki Nokki solution itself - other than it is alcohol free and can therefore be used on 78-rpm shellac records. There is a lot written about cleaning solutions and an amount of research and experimenting is recommended. The manual recommends that if alcohol solutions are used, they should not exceed 25% alcohol. |
| Operation |
|
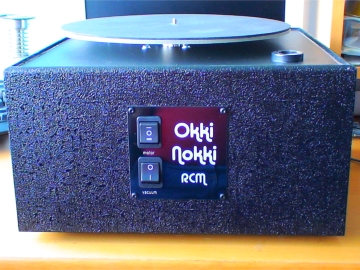
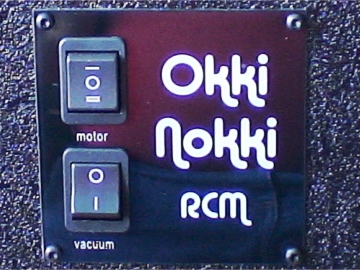
The front panel sports two switches. The first is the rotation switch - this has 3 positions, allowing clockwise or counter-clockwise rotation.
The second switch switches the vacuum on and off. Nothing much to report here - they are switches and they work as they should - just make sure you don't switch from one direction to the other without stopping for a second first to avoid putting too much stress on the motor. I was impressed by the amount of power that the motor appears to have. It allows you to use quite a lot of pressure onto those hard to clean records without complaining. |
| Emptying |
|
|
|
On the rear of the unit you can see a 'fluid release tube'. This has to be gently pulled out and the red stopper removed before tilting the machine backwards so that the fluid can be drained into a suitable container. Once emptied, replace the red stopper and re-insert the tube.
|
|
I was quite surprised the first time I emptied the RCM. I wasn't expecting so much dirt to be evident. This goes to prove its effectiveness at basic cleaning!
|
| In Action |
You will not remove all moisture from the record's surface with the vacuum - this is because the felt pads on the vacuum arm will inevitably get damp and leave a slight smear of liquid on the surface; especially around the place the arm is lifted from the record. The amount will increase with the number of cleaning cycles done before allowing the pads to dry. It is therefore important that once cleaned, a record is allowed to stand in air so it can dry thoroughly before playing - a plate rack is good for this, allowing you to stand the record upright.
|
Cleaning with the Okki Nokki |
Applying Gruv Glide |
On some records - especially ones that are prone to static charges (some are more prone than others for some reason and can remain so even after cleaning), I also coat with some Gruv Glide. I have only started using this since I got the Okki Nokki because it's great for such things. I am quite impressed by the results - only a very light coating is necessary to neutralise static in most cases and I have not noticed any sonic degradation or residue build-up on the stylus. It also acts as a lubricant, possibly extending the life of the vinyl slightly? Many years ago, I used a Zerostat gun for removing static - today I haven't got the patience for this (I used it as you are supposed to - with long drawn-out squeezes rather than using it like a pepper mill as I have seen many others use it) and think they are vastly over-priced nowadays. Besides, the Gruv Glide works for a much greater period, of course.
| Conclusion |
I'm still not 100% happy with the cleaning however, but I think this is more to do with the cleaning solution, and perhaps brushes, that I am using rather than the machine. I have seen from emptying the Okki Nokki that it is removing plenty of dirt. However, because I have so much of the supplied cleaning solution left, I have not been experimenting with other formulations although I do have a list of ones that I want to eventually try that I have read about on the Internet - that will be another story!
I can recommend the Okki Nokki as a machine to have a serious look at if you are thinking about an RCM - it does what it's supposed to do, it's cheap, and it's well built.
Written by Paul Brookes
Published 19 September 2008
| Turntable | Audio Note TT-2 |
| Arm | Audio Note Arm1 |
| Cartridge | Audio Note IQ2 |
| Phono Stage | Audio Note L3 Phono Stage Kit |
| Amplifier | Audio Note PQ Signature Kit1 |
| Interconnects | Audio Note AN-v |
| Speakers | Audio Note Kit03 Speakers |
| Speaker Cable | Unknown silver multi-stranded |
| CD Transport | Audio Note CDT-One |
| DAC | Audio Note DAC Kit 2.1 Signature with USB interface |
| Links |
| The Emporium |
| UK Distributer Page |
|
|