|
||||||||||||||||||

|
Soldering is really quite simple although some people struggle with it. I hope to impart the basics of soldering to you here in case you have no experience. So here we go.
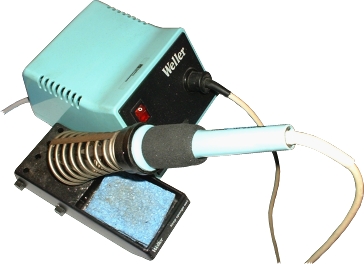
This is my trusty iron. Perfect for most light to medium soldering applications.
Essential Equipment and Practices
| Choosing the correct solder |
For non-audio use, I use a normal Ersin multicore 60/40 solder - 22 SWG in fact.
| Cleaning |
|

|
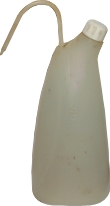
I got my isopropanol from RS Components part number 567-890 (dispenser not included).
| De-soldering |

My favorite method of de-soldering is to use a De-soldering gun. Just be sure that you have it at the ready and only touch the nozzle against the joint once the joint is hot enough - otherwise you will go through a lot of replacement nozzles. In addition, it is important to empty regularly. If you do not then the pathway will get clogged and cause other problems.
| Wire Stripping |

I use a spring-loaded wire stripper for the majority of jobs. These make quick and easy work of wire stripping. I often just separate the insulation slightly and then twist the rest of the insulation off. This allows you to twist the wire strands tightly with minimal time overhead.
For wire sizes that do not fit in the strippers, I use a scalpel (note: scalpels can be very misleading - they get blunt very quickly so don't assume that a new blade will only be a bit sharper than the old one - it will be a lot sharper - so watch those fingers!).
Mechanical Connection
Wherever possible, try to ensure a good mechanical bond before finally soldering. This is a good idea for a number of reasons:
- The more surface area contact that the items being soldered have; the better the electrical connection to begin with.
- The more stress can be put on the joint without causing any problems. This is especially true for wiring.
- A strong initial connection means that there is less likelyhood of the items moving during soldering (which should be avoided). Again, this is especially true for wiring.
The downside of a good mechanical connection before soldering is that once soldered, any mistakes are harder to rectify because de-soldering becomes more difficult to achieve (if a wire is wrapped around a connector, for example) - so be careful to get it right to start with. To me, 'tag' soldering is only really acceptable when experimenting - the final joint should be based on a good mechanical connection.
Golden Rules
There are some golden rules that you must learn and always bear in mind when soldering as follows:
- Surfaces and solder tip must be kept clean. A damp sponge is useful for cleaning the solder tip - just wipe the tip on it quickly whilst rotating it slightly. This should be done regularly.
- Think about the angle of the tip - you should make contact with both things being soldered in order for solder to flow correctly between them.
- Don't use too much solder - blobs cannot be verified as good joints.
- Correct speed is essential and is what needs the most practice. Applying too much heat will only cause problems and can result in faults later on. Apply too little and the chemical bond will be inadequate.
- Always allow joints to cool naturally - never blow on a joint; doing so will usually cause a bad joint.
- Joints should appear shiny. Dull, lumpy, or crystalline joints are bad and need de-soldering/re-soldering.
- Spikes should be avoided and are usually caused by bad timing and/or incorrect exit points and possibly an under-powered iron.
- Joints should be cleaned of residue which is usually sticky, attracting dirt and moisture that will cause future problems. Isopropanol (isopropyl alcohol) makes a good cleaning agent; coupled with a stiff brush.
- Practice makes perfect.
|
|