|
||||||||||||||||||

|
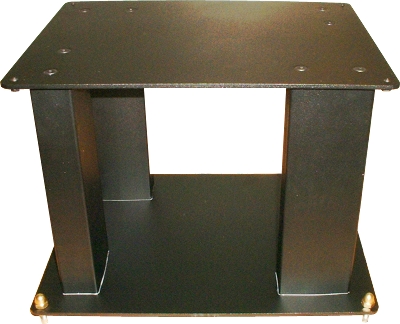
The Audio Note speaker stands do not come with the speaker kit, of course, but I could not resist getting the right stands to go with them, so I ordered a pair and decided to include them as part of the build.
Both stands come in the same box that weighed in at a massive 47lbs. They are of course a high mass design that can also be filled to increase their mass even further. I decided to fill them.
The recommended filler to use is either a lead-shot/sand composite or just sand on its own.
So the first problem was where to get the lead-shot and sand. The source that I found for the lead shot was a surprising one - a diving shop that is a short distance from me. I accidentally stumbled across it while I was Googling for lead shot. I didn't really have a clue how much to get and settled on 10Kg (22 lbs). This sounded a lot but, as I found later, I could probably have done with twice this amount.
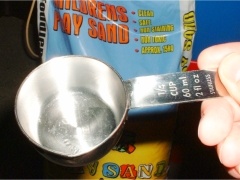
The sand was, of course, easier. It should be dry sand so most common builder's sand is out of the question. I went for children's play sand, which is fine and non-toxic (I have kids so buying too much of it wasn't a problem).
Assembling
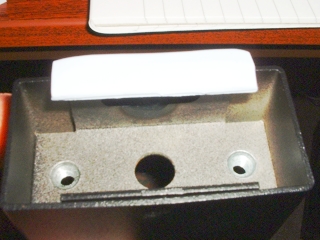
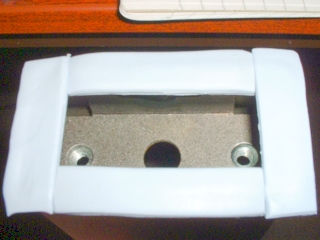
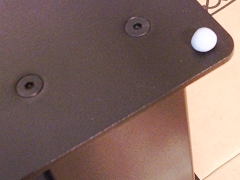
I began by fitting each of the columns to the base plate. Two screws hold each one of them on. As I intended to fill the columns once they were attached to the base plate, I decided that a seal might be a good idea to stop any sand from escaping to the outside world. I did this by placing strips of our trusty Blu-Tack on the edges of the columns that would come into contact with the base plate.
|
|
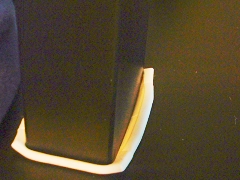
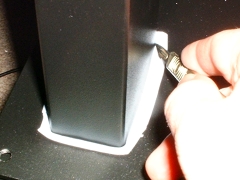
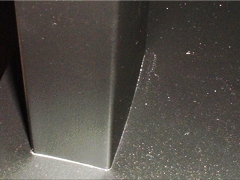
The columns were then screwed into place (nice hefty hex slot screws are supplied for both top and bottom). I tightened them up alternately, bit by bit, so that the column edges bit into the Blu-Tack evenly. You can tighten these quite tightly. Once tightened, the now squashed and displaced Blu-Tack can be trimmed with a scalpel. Angle the blade inward and take care not to scratch the finish - especially around corners.
|
|
|
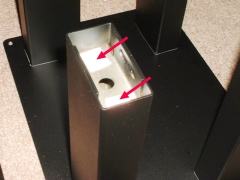
Next, it was time to fill the columns. I waited until I had all columns fitted to both stands. I did this so that I could fill the columns on both stands consistently and evenly. First, I covered the screw holes with pieces of insulation tape in case any of the sand got into them and caused problems later.
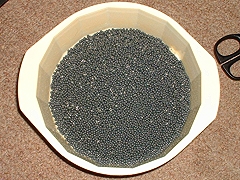
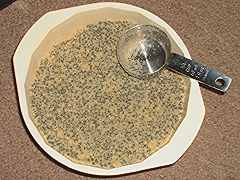
The lead-shot/sand composition was easy to mix. I did this by emptying a quantity of lead-shot into a bowl and then scooped and mixed in quantities of sand until a nice consistency was achieved.
|
|
I was unsure about how much lead-shot would be adequate, so I decided to fill alternately with sand only and lead-shot/sand. This turned out to be a good idea because of the amount of lead-shot that I had purchased - I just had enough to do this and fill all columns.
I used a funnel to get the fillers into the columns via the central hole. The lead-shot/sand composite went in easily but the sand-only fills needed a little coaxing - I used a pencil to push the sand down through the funnel.
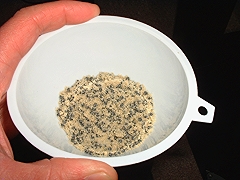
I used a quarter cup measuring scoop when filling, levelling each one so I knew that I would have exactly the same amount in each scoop. I also made sure that each preparation of lead-shot/sand made enough to fill all 8 columns (1 scoop per column). This way I could be sure that each set of columns, and both stands, had exactly the same amount of filling. After each filling 'cycle', I tilted the stands 45 degrees in four different directions in an attampt to even out any 'mounds' that might have been created.
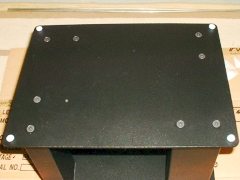
Once filling is complete, the top plate can be screwed on. You can do this quite tightly. I did not bother to seal the tops of the columns.
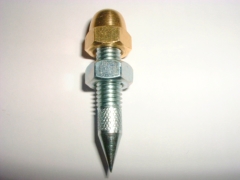
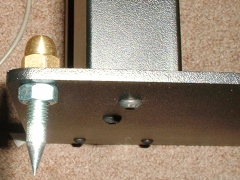
Next, it was time to fit the bottom spikes. These can be fitted either way up - if spikes are not required (perhaps because of an expensive floor covering), they can be inverted so that the brass top can go on the bottom instead.
First, the spike is fitted with the locking nut. The spike is then screwed into the threaded hole in the base plate and the rounded brass top screwed onto the spike. The spikes can be adjusted to the required height before finally tightening the lock nuts.
|
|
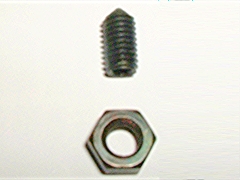
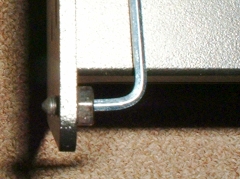
Next, the top spikes are fitted. Unlike the bottom spikes, these are actually blunt-ended grub screws. It is first screwed through the threaded hole in the top plate. Then the lock nut is screwed onto this. You adjust the spike to the required height using a provided allen key before tightening the lock nut.
|
|
I adjusted these top spikes so they just about appeared through the top of the top plate. I did this because I wanted to use a blob of Blu-Tack to hold and support the speakers instead of relying solely on the spikes. This is actually a suggested tip direct from Audio Note - not me going Blu-Tack crazy (this time at least).
|
|
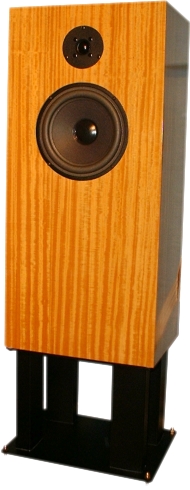
The stands are now complete and ready to accept their speakers.
|
|