|
||||||||||||||||||

|
My finished L3 Phono Kit
Introduction
This section of the site takes you through the construction of new L3 Phono Stage Kit from AudioNote Kits. I have built quite a number of their kits now - all with great success and pleasure.It has been some time now since I completed the construction of the Kit1 Phono Stage. Since then a new one has replaced the kit itself. Also, I have since built the DAC Kit 2.1, which surprisingly has surpassed my analogue set-up (in combination with an Audio Note CDT-One transport).
I know from the original demonstration of my turntable (Audio Note TT-2, Arm1, IQ2) that it can perform, and deserves, better. I still love to play records and so decided to build the latest phono stage offering from AudioNote Kits - the L3 Phono Stage Kit in the hope that it will breath new life into my analogue set-up. To save a little on cost, I am going to re-use the mains transformer and choke from my old phono stage but everything else in the kit is new.
The arrival / First impressions
Well packed as always with their kits and took 6 days to arrive in the UK from Canada.

The picture shows what was sent with the kit. Note, however, that I did not receive the mains transformer and choke as I am going to re-use those from my old phono kit.
All the contents were padded with packaging material and fitted snugly into the chassis, which was then secured and itself surrounded by polystyrene - making the whole thing a very sturdy package for long distance delivery.
As you can see from the picture, the various parts of the build are separated into different kit bags, which then usually contain other labelled bags within them - making the finding of parts easy. The main kits bags that contain multiple components also contain a parts checklist.
As usual, a very good and detailed manual is included - 62 pages in all.
Overview
The L3 Phono Stage Kit is a combination of a couple of parts from some of Audio Note's finished products. Namely:
- The phono stage from the M3 phono pre-amp and M3 RIAA phono stage.
- The M2 Power Supply from the finished product line.
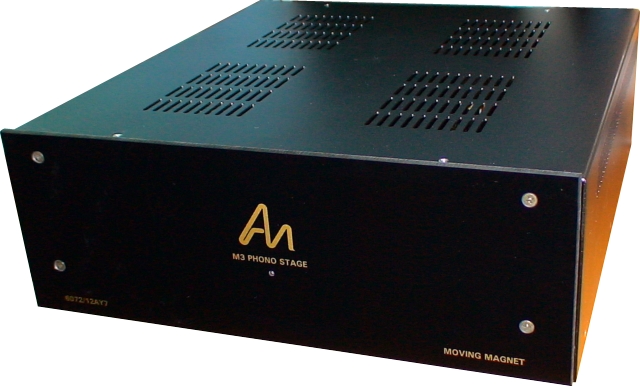
The M3 phono stage has been highly regarded by its users for many years and is still a top seller.
The M2 power supply is also used in my DAC Kit 2.1 (which I love to bits) and old Kit1 phono stage kit (now to be replaced) so I am very familiar with its construction and set-up. In fact, because I have documented the build of this board twice before, I will be re-using some of that information in the subsequent build pages because that should save me a great deal of time and effort.
The M3 phono board is said to be a very good and accurate reproduction of the RIAA curve used to 'encode' vinyl records. Accuracy is very important in order to 'decode' the correct frequency response curve when reproducing. It is also a silver hard-wired board! I have built 2 such silver hard-wired boards up to now and enjoy their construction immensely (much more fun than a printed circuit board).
The finished kit supports moving magnet cartridge input. A step-up transformer, configurable between 1:10 and 1:20 step-up ratio is available for it however, as a stand-alone step-up unit from the same supplier.
Why a silver hard-wired phono board? My answer to this question in its simplest form is that it is superior to a PCB both sonically and electrically. My reasoning is as follows:
Connections are made from one component to another either using the components' legs themselves or, if they are not long enough, by extending them with audio grade silver wire (the best conductive metal). In comparison with a PCB, this method reduces the number of soldered joints made and also reduces the reliability on using very thin layers of copper (PCB track) to use as a conductor in the circuit. Many implementations of hard-wiring, however, rely upon regularly spaced solder tags which can sometimes unnecessarily increase the length of wiring required. Audio Note, however, tend to use hard-wiring boards - these look just like PCB's from the top but are hard-wired from below. This method significantly reduces the length of wiring.
About the Phono Stage Kit Range
The L3 Phono Stage Kit is available with many different options available.The configuration that I decided upon was as follows:
- 1 Watt tantalum resistors
- Copper foil signal capacitors
- Black gates
- AN-V signal cables
For more information and pricing, please visit the AudioNoteKits.com website.
A Note on Wiring
Please note that on the remaining pages you will see me use some wiring techniques that you may find a little off-putting. This is simply the way that I approach wiring jobs. The method recommended by the manufacturer is to actually use the twisted wire approach and tidying with tie-wraps etc. such techniques will yield results that are just as good (IMHO). So, it is up to the builder as to how he or she approaches wiring.
Special Build Notes
I have built the M2 power supply board in two other projects that I have documented elsewhere on this site. Therefore, I have decided to re-use some of the text, pictures, and videos for this build. So, the power supply parts in the finished kit pictures may not look exactly like those detailed in preceding pages. This saves me an awful lot of time!
|
|