|
||||||||||||||||||

|
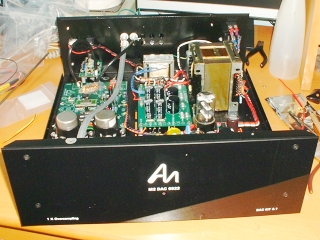
At this stage of the build, everything has been connected up. The final thing that must be done is the fitting of the front panel and gluing the front panel LED.
I left the fitting of the front panel until last simply so that there was no danger of it getting marked during the rest of the build. Four black screws hold it on.
Final Checks Before Testing
It is always important to give the unit that one last extra cautious check before plugging everything in for the first time. Just to make sure that everything has been screwed down correctly and no bits of wire or tools have been left floating about inside the chassis. Also note that the digital board relies on earth connections to be made by some of the pillars that it sits on.It is also a good idea to switch on before connecting everything up just to check all the test voltages again.
Hooking Everything Up
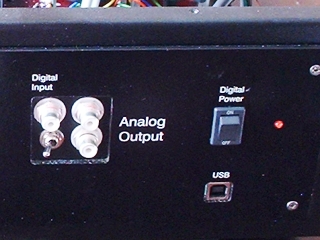
Signal wise, there are two inputs - normal digital in via RCA and USB connection (if you have that option). There are also 2 outputs - left and right stereo outs. These connect to the input of your integrated amplifier or pre-amp.The first thing that must be done whenever testing out a new build is to set the amplifier (or pre-map) volume to the zero position. The unit can then be switched on then, after about 5 seconds (while the power supply comes alive), slowly advance the volume control while nothing is playing. There should be no loud humming or anything suspicious.
Testing Normal CD Operation
After returning the volume back to zero, start playing a CD and slowly advance the volume. You should hear music on both channels. I did, and I have to say I was surprised by the quality - even at this early stage!
Testing USB Operation
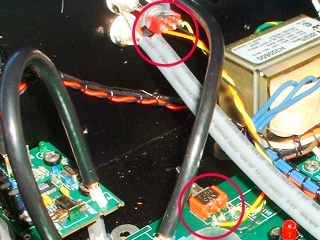
Now, I opted for the USB option simply because I was curious. Curious because I had been hearing highly conflicting reports about the quality that could be gained. Some people said it was useless; others said it was superb. So I had to find out for myself.To switch between normal and USB input, you have to flip a switch that is located on the back edge of the digital board. In the DAC Kit 1.1, this switch extends through the chassis to enable switching between RCA and XLR inputs. However, in this kit it looks like the digital board had to be moved away from the back of the chassis to allow room for the USB board.
When you plug the USB cable into the DAC, the computer should automatically recognise it as a USB Audio DAC (or at least my Dell PC running XP does). The computer then defaults to outputting to it unless applications have other output devices configured specifically. This means that even normal computer sounds are directed to the DAC - I wasn't expecting that and see it as a bonus although I'm not exactly sure at this stage how it decides on how to convert things.
I already had a number of CD's copied to a few directories. I copied these using Exact Audio Copy which is a freeware program - creating bit image WAV files. I first played back by simply double-clicking on the files and letting Windows Media Player play them. Later, I began to use Foobar 2000 because that let me configure the method to use to output (DirectSound v2, Kernel Streaming, etc).
Unexpected Results
I was totally surprised at the quality of output that the USB interface allowed.I didn't really think that I would want to use this option as a regular thing but I now knew that I had to experiment further. To enable me to do this, I decided that I would perform one last operation before securing the lid of the unit.
So, I went out and bought a small toggle switch that I could fit in the remaining RCA hole in the back panel. I then connected 3 wires to it, connected the other ends of the wires to the legs of the switch on the digital board, and finally snipped each leg in two places so there was now a gap - leaving the old switch now totally disconnected.
|
|
With the switch in place, I was now able to switch inputs without having to remove the lid of the unit. Perhaps if I were to make another of these DAC's I might drill a hole for this switch near the USB input or even on the front panel but I have full access to the switch where I have put it so it's not a problem.
So, now it was time to secure the lid, take some final pictures, connect to the rest of my system, and enjoy.
The lid is secured with a total of 10 small screws. Once in place, the unit as a whole is very sturdy and solid.
First Impressions
Considering the number of components that this DAC has inside it that need quite some burn-in time to perform at their best, I was not expecting the DAC to make me say 'wow' the first time I switched it on - but it did.I simply couldn't believe how good it sounded in comparison with my old DAC Kit 1.1. It is simply much, much better in every way and it can only get better as the Black Gates and Copper Foil capacitors break-in.
The first things that struck me were the superb definition of the lower bass end and the degree of airiness in the music.
I intend to write a review soon so I will go into all that then as well as the changes that the unit goes through as it breaks-in.
|
|